The environmental portraits allow you to tell good stories about the subject of your photographs.
These portraits are something between a studio portrait and a candid portrait. The place where you take a photograph plays an essential role in giving the viewer pieces of information about your subject. In other words, the environmental portrait is a fantastic opportunity to make storytelling about your subject.
With this style of portrait photography, you can make a shoot that captures your subject at work, home, or another location meaningful for the subject. Rather than focusing only on the subject, the environmental portrait uses the background to convey an idea and says something about the photograph’s subject.
The environmental portrait provides context, usually lacking in a studio portrait. Through this kind of portrait, you can create visual interest for your images and reveal a story about your subject, about your subject’s life and feelings.
Difference between Portrait, Candid Portrait, and Environmental Portrait
In a portrait, you are trying to capture your subject’s essence. Usually, the subject’s face is essential and is predominant in this portrait genre. You can find a lot of information about the portrait in this article.
In a candid portrait, the subject is not posing and is, in most cases, unaware of being photographed.
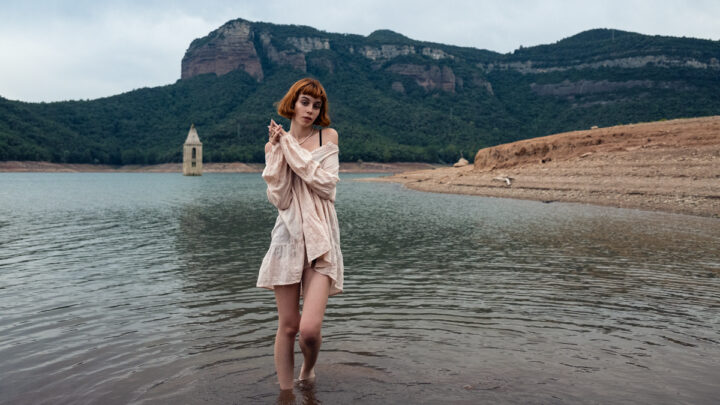
The environmental portrait is a portrait where the background tells strong stories about the subject.
The immediate surroundings in an environmental portrait will tell strong stories about the subject, giving insight into where the subject is, what he/she is doing, who is him/her, and how he/she feels.
When an environmental portrait is a candid portrait, sometimes it can be seen as street photography.
The setup for an environmental portrait
- Know your subject. You can increase your subject’s comfort talking with him/her. Connecting with the subject of your photograph is always an excellent idea. You can find a lot of information about how important it is to communicate with the subject of the picture by clicking this article. Talking with your subject, you will figure out the type of shot that reflects who he/she is. Knowing who you photograph is key to making a fantastic environmental portrait. The connection with the subject of the picture will help you to create meaningful photos.
- Get to know the location. Do research about possible places and the different light conditions you may find on the field. This way, you can plan the poses ideas and the style of photographs you can take on location. Remember to check the background to find the elements in it that will support your subject story. You should always include something that illustrates aspects of your subject.
- Make a plan for the shot. Think about some idea that you think can work to tell the story about your subject. Be prepared for the light conditions, especially when shooting natural light. Study what you can make with the available light, the colors you find on location, and the dresses you asked your subject to wear.
Some tips to make better Environmental Portraits
Be focused on the story: don’t get distracted by the gear and focus on the story you want to tell about your subject. Remember the quote of David Alan Harvey: “You can’t be an author unless you have something to say.” This is exceptionally true, say something, or your photograph will be aesthetically beautiful but empty of any interesting content. Hundreds of thousands of images flow across our mobile phones, tablets, and computer screen daily. Try to be different with your voice, say something, and give meaning to your images through storytelling.
Use a relevant background: as the environment is an essential element of the environmental portrait, the choice of the location is critical. Choosing the background, consider these elements: how the environment helps you to tell who the subject is, how it helps to tell what the subject does or how he/she feels, and why the subject is there (to work, eat, because he/she lives there, and so on). Then, focus on the elements of the background you can use for your storytelling.
About composition: also the composition may help you with storytelling. Try to immerse yourself in the location and see the world with your subject’s eyes using his/her perspective. Give a try the rule of thirds. But you can also go beyond this traditional rule of composition if your storytelling needs to immerse the viewer in the world of your subject using a different point of view and composition.
Use the right lens for environmental portraits: To adequately capture this kind of portrait, you must choose the right lens. For my environmental images, I use mainly my 35mm focal length. It gives me the view I have with my own eyes and works well for environmental portraits. Furthermore, the 35mm allows you to be close to your subject and still include enough background. Anyway, you can also use different focal lengths. Ensure that the focal length will enable you to have both the subject and the environment.
Remove from the frame any distracting element: be focused on your subject and the primary environmental elements, excluding all the distracting elements that are unnecessary for the storytelling. Look at everything you see in the background. If you find something distracting that can be removed, just move the subject away or try to frame the scene from a different angle.
Everything included in the frame should support your storytelling.
Try with different depths of field: usually, taking environmental portraits, it is a good idea to use a high number of f-stop to have a more significant part of the photograph in focus. But you can also decide on a narrower aperture setting, a lower f-stop number, to have some bokeh. Anyway, always be sure to show enough details of the environment.
It is essential to balance how much is in focus of the scene. I usually use a medium aperture with the background and the subject at a close distance and focus on the subject’s eyes.
Use aperture priority: when you are shooting outside, working fast and being sure to get a good result is always a good idea. For this reason, you can use Aperture Priority Mode. Aperture Priority is a fantastic mode you find on your camera dial. Through Aperture Priority, you can work faster while making photographs as you choose the aperture you want for your images. On the other hand, the camera will set the proper shutter speed. If you are interested in learning about Aperture Priority, you can find more information here.