Ten settings to Make Better Photographs
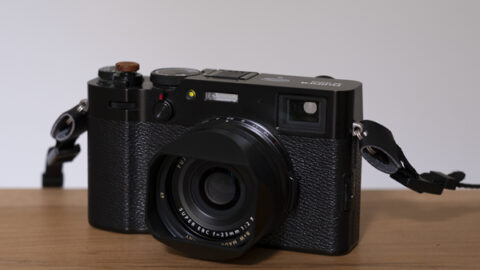
Street photography is a unique genre that demands a camera that can capture the essence of a moment in time. The Fujifilm X100V is an excellent choice for street photographers, with its small size, retro styling, and advanced features. However, to truly unleash its potential, there are a few settings that need to be tweaked. Here are 10 settings that you need to change on your Fujifilm X100V to make it better for street photography.
1. The Leaf Shutter
One of the key features of the Fujifilm X100V is its leaf shutter, which is very quiet and convenient for street photographers who want to capture candid moments without drawing attention to themselves.
It is possible to turn off the fake shutter sound that, by default, is played when you take a photo. To do this, go to the main menu and select the “Wrench” icon. Then scroll down to “Sound Set-Up” and select “Shutter Volume”. From here, you can turn off the shutter sound completely or adjust it to a lower volume to further reduce any noise. My advice is to turn it off to be as discrete as possible.
With the fake shutter sound turned off, you can shoot in complete silence, making it easier to blend in with your surroundings and capture those candid moments that make street photography so compelling.
Menu > Wrench Icon > Sound Set-Up > Shutter Volume > Off
2. Shoot Fine + Raw
Another important setting to adjust on the Fujifilm X100V for street photography is the image quality. By setting the image quality to Fine + Raw, you can get the best of both worlds – high-quality JPEGs with the beautiful film simulations that Fujifilm is known for and the flexibility to eventually edit your RAW files to your liking.
To change the image quality setting, go to the main menu and select the “I.Q” icon. From there, scroll down to “Image Quality” and select “FINE + RAW.” This will ensure that your camera saves both a high-quality JPEG and a RAW file every time you take a photo.
With this setting, you can enjoy the convenience and aesthetic benefits of shooting with JPEGs while also having the option to fine-tune your images in post-processing. The RAW files give you the ability to adjust things like exposure, white balance, and sharpness to your liking without sacrificing the beautiful film simulations that make the X100V such a popular camera for street photography.
Menu > I.Q. Setting Icon > Image Quality > FINE + RAW
3. Turn off the PRE-AF
The PRE-AF feature can be a limitation in street photography, as it can cause your camera to focus on unintended subjects and miss the moment you are trying to capture. Fortunately, it’s easy to turn off this feature on the Fujifilm X100V.
To turn off PRE-AF, go to the main menu and select the “AF/MF Setting” icon. From there, select “Pre-AF” and toggle it to “OFF.” By turning off PRE-AF, you can ensure that your camera only focuses when you half-press the shutter button, use the back button focus, or tap on the screen of the camera, giving you more control over when and where your camera focuses.
With PRE-AF turned off, you can focus on capturing the moment without worrying about your camera focusing on unintended subjects. This is particularly important in street photography, where you often only have a split second to capture the perfect shot. So, make sure to turn off PRE-AF and take control of your focus, so you can capture those fleeting moments with ease.
Menu > AF/MF Setting Icon > PRE-AF > OFF
4. Lock the Focus Lever
The Focus Lever on the Fujifilm X100V is a convenient way to quickly move your focus point around the frame by moving the little knob that sticks out of the back side of your camera. However, it can also be a source of frustration if you accidentally bump it and your focus point ends up in the wrong spot. Fortunately, there’s a way to lock the Focus Lever so that it doesn’t move around unintentionally.
To lock the Focus Lever, go to the main menu and select the “Wrench Icon,” select “Button/Dial Setting,” select “Focus Lever Setting” and choose between “click to unlock” or “lock.” This will prevent the Focus Lever from moving around when you accidentally bump it, ensuring that your focus point stays where you want it.
With the Focus Lever locked you can focus on capturing the moment without worrying about accidentally moving your focus point. This is especially important in street photography, where every moment counts, and you don’t want to miss the shot because of an unintentional bump of the Focus Lever. So, make sure to lock it and take control of your focus point, so you can capture the perfect shot every time.
Menu > Wrench Icon > Button/Dial Setting > Focus Lever Setting > click to unlock or lock (OFF)
5. Focus Frame
The ability to adjust the size of your focus point is an important setting to consider when shooting street photography with the Fujifilm X100V. By default, the focus point may be too large and may not be ideal for capturing precise focus in certain situations. Fortunately, it’s easy to change the size of your focus point using the camera’s menu system.
To change the size of your focus point, first, press the “Menu” button on your camera, then select the “AF/MF Setting” icon. From there, select “Focus Area” and use either the front or back dial to adjust the size of your focus point. By making it smaller, you can focus more precisely on specific areas of your frame, which is especially important when photographing subjects with a lot of detail.
With a smaller focus point, you can be sure that your camera is focusing exactly where you want it to, ensuring that your shots are sharp and in focus. This is especially important in street photography, where you may need to capture quick, decisive moments with precision. So, be sure to adjust the size of your focus point to suit your shooting needs, and take control of your focus for better results.
If locking the Focus Lever, you selected the option “click to unlock” to change the size of the focus point you just need to click the little knob that sticks out of the back side of your camera: in this way, you will be able to move your focus point or resize it just turning the back or the front dial.
Personally, especially when I am shooting street photography, I have the size of the focus frame set to the smallest focus size or to second to the smallest size, which gives me the opportunity to use a precise and easy-to-see focus point to work with.
Menu > AM/MF Setting Icon > Focus Area > Adjust the size through the back or front dial
6. Lossless Compressed Raw Files
The image file size is an important consideration in street photography, where you may need to take many shots in a short amount of time. Fortunately, the Fujifilm X100V offers a way to reduce image file size without sacrificing image quality by using the Lossless Compressed option.
To reduce the image file size, go to the main menu and select the “IQ Settings” icon. From there, select “Raw Recording” and choose “Lossless Compressed.” This will reduce the size of your RAW files without any loss of image quality, allowing you to take more shots and save more images on your memory card.
By reducing the image file size, you can make your Fujifilm X100V even more efficient for street photography, allowing you to take more shots and capture more moments without having to worry about running out of space on your memory card. So, be sure to adjust the RAW file settings to suit your needs and take control of your image file sizes for better efficiency.
Menu > I.Q. Settings Icon > Raw Recording > Lossless Compressed
7. Simplify the Quick Menu
The Quick Menu on the Fujifilm X100V is a powerful tool that can help you access important settings quickly and easily. However, by default, it can be overwhelming with 16 icons, making it difficult to find the settings you need quickly. Fortunately, you can customize the Quick Menu to make it more efficient and easy to use.
To customize the Quick Menu, go to the main menu and select the “Wrench” icon. From there, select “Button/Dial Settings” and choose “Edit/Save Quick Menu.” Here, you can choose to display only 4 icons in the Quick Menu, making it easier to find and access the settings you need quickly.
By customizing the Quick Menu to display only the most essential settings, you can ensure that you have quick and easy access to the features you need the most in street photography. This can be especially important when you need to make quick adjustments on the fly, without wasting precious time searching through menus. So, take the time to customize your Quick Menu and make your Fujifilm X100V even more efficient for street photography.
Personally, I am using the Self Timer, the Face/Eye detection Settings, the Film Simulations, and the White Balance.
Menu > Wrench Icon > Button/Dial Settings > Edit/Save Quick Menu > select 4
8. Turn on the AM + MF
The AF + MF feature on the Fujifilm X100V is a useful tool that can help you achieve more precise focus when shooting street photography. By enabling this feature, you can switch between autofocus and manual focus quickly and easily, allowing you to focus on the most important parts of your frame.
To enable AF + MF, go to the main menu and select the “AF/MF Setting” icon. From there, select “AF + MF” and turn it On. This will allow you to switch between autofocus and manual focus by simply rotating the focus ring while half-pressing the shutter button.
By using AF + MF, you can ensure that your shots are in focus, even in tricky situations where the autofocus may struggle. This is particularly useful when shooting reflections or through windows, where the autofocus may be confused by the reflections or glare. With AF + MF, you can quickly switch to manual focus to achieve the precise focus you need, without having to waste time adjusting the focus point or switching to manual focus mode manually.
So, make sure to enable AF + MF and take advantage of this powerful feature for better focus and more precise shots in street photography.
Menu > AM/MF Setting Icon > AM + FM > On
9. Custom your EVF Display
Customizing the EVF and LCD display settings on the Fujifilm X100V is an important consideration for street photographers who need to quickly access important information while shooting. By adjusting the settings to your liking, you can ensure that you have all the necessary information at your fingertips, without any distractions or unnecessary clutter.
To customize the EVF and LCD display settings, go to the main menu and select the “Wrench” icon. From there, select “Screen Set-Up” and choose “Display Custom Settings.” On page three of this menu, select “EVF/LCD” and tick or untick the settings to your liking.
By customizing the EVF and LCD display settings, you can ensure that you have quick and easy access to the information you need most, such as focus frame, aperture, shutter speed and Iso, frames remaining and so on. This can be especially important in street photography, where you need to make quick decisions and adjustments on the fly. By reducing distractions and only displaying the most important information, you can stay focused on the task at hand and capture better shots.
So, take the time to customize your EVF and LCD display settings, and make the Fujifilm X100V even more efficient for street photography.
Menu > Wrench Icon > Screen Set-Up > Display Custom Settings > EVF/LCD (page 3)
10. Use the Boost Mode
The Boost Mode on the Fujifilm X100V is a powerful tool that can help you achieve better performance in certain situations. By enabling this mode, you can improve the refresh rate of your EVF and LCD screen, as well as increase the speed of your autofocus. However, it’s important to note that enabling Boost Mode will also drain your battery quicker, so you’ll need to keep an eye on your battery level when using this mode.
To enable Boost Mode, go to the main menu and select the “Wrench” icon. From there, select “Power Management” and choose “Performance.” Here, you can choose “Boost” to enable the Boost Mode and improve the performance of your camera.
By enabling Boost Mode, you can ensure that your camera is performing at its best in situations where you need it most. This can be especially important in street photography, where you may need to capture quick, decisive moments with precision. With Boost Mode, you can take advantage of the improved refresh rate and autofocus speed to capture those fleeting moments with ease.
So, be sure to enable Boost Mode when you need it, and take control of the performance of your Fujifilm X100V for better results in street photography.
Menu > Wrench Icon > Power Management > Performance > Boost