Street photography is one of the most popular genres in the world of photography. Taking pictures of everyday life in an interesting way is a challenge that many photographers enjoy. When it comes to street photography, the camera settings you choose can make or break your photo. In this article, I will discuss my camera settings for street photography and explain why they are important. I will also provide some tips to help you get the most out of your camera. By understanding the fundamentals of camera settings and how they affect your photographs, you will be able to create stunning street photography images.
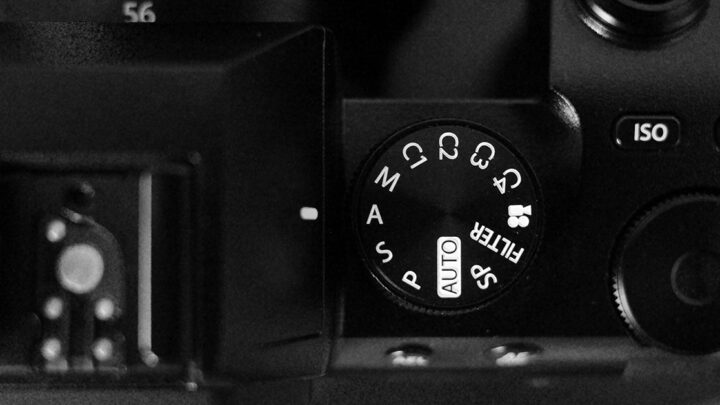
The way I set my camera for street photography may not necessarily work for you, in fact there is not a wrong or a right to do it. These are the settings I use on my Fujifilm X100V but they can. work in any digital camera, whatever brand you use.
When it comes to street photography, being able to react quickly and shoot instinctively is key. To do this, it is important to keep your camera settings as simple as possible.
Having too many settings and variables to adjust can be overwhelming, and can take away from the moment of shooting. When you’re out in the streets, you don’t have time to adjust settings, and you don’t want to miss a shot while you’re fiddling with the camera.
By keeping your settings simple, you’re able to focus on what’s happening in front of you and react quickly. This allows you to capture the scene without missing a beat.
Setting your camera up to shoot in manual mode with a few simple settings can be helpful for street photography. Set your shutter speed, aperture, and ISO to something that can work in most lighting conditions. This will allow you to quickly adjust if the light changes, or if your subject moves.
Street photography is all about capturing the perfect moment, and to do this, you need to be aware of your settings and be able to adjust them quickly as the scene changes. If you’re fiddling around with your camera settings, such as aperture, shutter speed, or ISO, you run the risk of missing the crucial moment. When you’re out in the streets, you need to be able to spot a noteworthy scene and instantly adjust your settings to capture it.
If you’re a street photographer, you know that the best shots come when you are quick, decisive and prepared. You don’t have time to get caught up in the technical details of your camera – you need to be able to capture the moment before it’s gone. If you’re constantly having to fiddle with your camera settings such as aperture, shutter speed or ISO, you’re more likely to miss the moment that you’re trying to capture.
The best way to avoid this is to be prepared and know your camera settings ahead of time. Know what works best for the lighting conditions you’ll be shooting in and the type of photograph you’re trying to capture. This way, you can quickly adjust your settings as needed and spend more time focusing on the scene.
It’s also important to practice with your camera so that you become more familiar with how it works and how to adjust settings quickly and accurately. This will allow you to get the shot you want without having to fiddle around too much.
Finally, practice being decisive and don’t hesitate when you see a shot you want to take. The longer you wait, the more likely you are to miss the moment.
By being prepared, practicing with your camera and learning to be decisive, you can avoid the frustration of missing the shot because you’re busy fluffing around with your camera settings.
Shutter Speed
Let’s start with the shutter speed. Shutter speed is the length of time that a camera’s shutter is open during exposure. In street photography, the shutter speed must be fast enough to freeze the motion of the subject and to prevent any blur from camera shaking. A minimum shutter speed of 1/200 sec. is recommended for most street photography.
You don’t want to lose a photograph because of subject blur or camera shake. For this reason, I tend to use the minimum shutter speed of 1/200 sec. and to set a faster one every time it is possible, depending on the light conditions. With a fast shutter speed, you can freeze the action and ensure that your street photography shots come out sharp and clear.
Aperture
Context is essential in street photography. It helps to tell the story of a scene and adds depth and meaning to an image. A photographer should strive to capture as much contextual information as possible in order to provide viewers with a better understanding of the scene and the people in it.
Using a small aperture will help to achieve this. It allows photographers to include more of the background and surroundings in the image, creating a more complete story. This helps viewers to identify with the people in the image, as well as providing them with a better idea of the environment in which the scene is taking place.
Context also helps to provide clues as to why certain people may be in a particular location, or why certain activities are taking place. It can give viewers a better idea of the context of a particular moment in time, which can be incredibly powerful.
In conclusion, context is extremely important in street photography. This is the reason why I usually set an aperture of at least f/8 every time it is possible depending on the light conditions. Using a small aperture will help to ensure that as much contextual information as possible is included in the image, creating a more complete story and a more powerful image.
Aperture and Layers
Layers are an essential part of street photography. They help to create depth and visual interest in the photo by making different areas of the image stand out from one another. Layers can be created by including different elements in the photo, such as people, buildings, and other objects. By including multiple layers in a street photograph, the viewer can more easily recognize the relationships between the different elements in the photo.
In a street photograph with layers, you can recognize a foreground, a middle ground, and a background.
A small aperture is one way to achieve better layering in a street photograph. This can be done by setting the aperture to a smaller number, such as f/8, f/11, or f/16. This will result in a greater depth of field, which will allow the photographer to capture more layers of the scene. The small aperture will also help to blur out any distracting elements in the background, such as other pedestrians or street signs, allowing the main elements of the photo to stand out more clearly.
The aperture of f/8 represents a good compromise as it gives you all the depth of field you need in street photography, letting a reasonable amount of light to enter into the lens.
Using layers in street photography can help add visual interest and depth to the photo, and using a small aperture can help achieve a better result. By including multiple layers in a street photograph, the viewer can more easily recognize the relationships between the different elements in the photo, and the small aperture will help to have a sharp image without losing any detail.
The Iso
One of the most important elements of street photography is setting the correct ISO. The ISO setting determines the camera’s sensitivity to light, and it can greatly impact the outcome of your photos.
Generally speaking, when shooting street photography, setting the ISO as low as possible is important. This will help reduce noise and graininess in the photographs, resulting in sharper images. Commonly, you should keep your ISO setting between 100-400 for most street photography. However, it’s important to remember that each situation is different and may require you to adjust the ISO accordingly.
When shooting in low-light situations, such as at night or indoors, it may be necessary to increase the ISO for the camera to be able to capture enough light. However, it’s important to remember that a higher ISO setting will also increase the amount of noise in the photograph.
Anyway, you don’t always get the perfect light conditions to set the ISO value between 100 and 400. When shooting street photography, setting the ISO manually is a must to get the desired results. I usually set the ISO between 100 to 6400, depending on the light conditions. The lower the light, the higher the ISO I use. I am willing to sacrifice a bit of noise to get the desired results, and I am confident that even at 6400 ISO, my camera, and most cameras nowadays, will do a great job.
I also make sure to adjust my shutter speed and aperture accordingly to get the right exposure for what I am trying to capture. I find it essential to use the right combination of ISO, shutter speed, and aperture to get the desired results for my street photography.
Overall, I have found that setting the ISO manually is an essential part of my street photography. It allows me to adjust the light and exposure to get the desired results. I also make sure to adjust my shutter speed and aperture accordingly to get the right exposure. With the right combination of ISO, shutter speed, and aperture, I can get the desired results for my street photography.
Overall, keeping your camera settings simple for street photography is essential for being able to react quickly and shoot instinctively. By setting your camera up with a few simple settings, and practicing with them, you’ll be able to capture the moments you want without missing a beat.