Street photography can be exhilarating, with the potential to capture unique and fleeting moments on the fly. In this fast-paced and unpredictable environment, controlling your camera’s focus is essential for capturing the shot you envision.
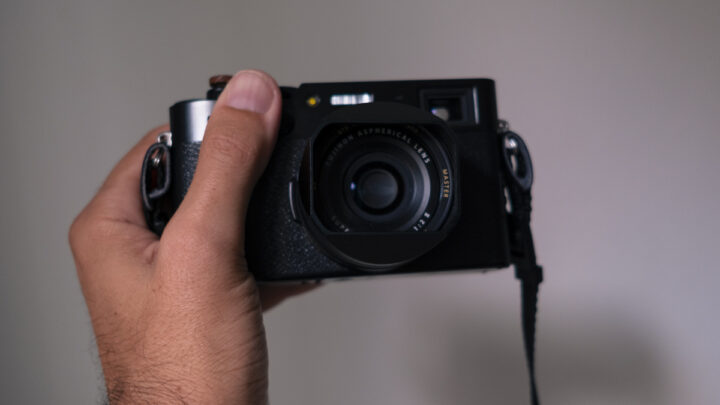
The Fujifilm X100V camera offers three focus modes – Manual, Single, and Continuous – each with its advantages and performance capabilities that can help you achieve the desired results in different scenarios.
When every second counts and unpredictability is the norm, a thorough understanding of your camera’s focus modes can help you stay focused on the moment and easily capture stunning street photographs.
Timing is being in the right place at the right time when something interesting is happening, and you are there, ready to capture the moment in a photograph. But, still, timing is also being prepared to capture the decisive moment as it unfolds in front of your eyes.
When something unpredictable and unexpected is happening just in front of you, the last thing you want is to be there fiddling with your focus, unable to capture the moment you were dreaming of freezing in a fantastic street photograph.
Fujifilm focus modes
Understanding the focus modes of the Fujifilm X100V is essential for controlling your creative process and capturing your images more efficiently and effectively.
This camera offers three focus modes:
- Manual
- Single
- Continuous
Each focus mode has unique advantages and performance capabilities for specific usage scenarios. The focus mode selector is located on the left side of the camera body, providing easy access to these modes. While it’s possible to use just one focus mode for any situation, it’s essential to choose the appropriate mode for the scene to achieve the desired results. Selecting the wrong focus mode can lead to misfocused shots and diminish the overall quality of your photographs.
If interested, I also wrote an article about Mastering street photography with the Fujifilm X100V, and an article about Hiking with the Fujifilm X100V.
The Manual Focus Mode
In the Manual Focus Mode, you have complete control over the focus by rotating the focus dial on the camera’s lens. For example, you can turn the dial clockwise to focus further away or rotate it anticlockwise to focus closer. In addition, there are some extra settings you can adjust in Manual Focus Mode to make it works in the best possible way for you.
The focus area
You can find the focus area if you push the Menu button and go to the AF/MF icon. Then, using the rear control dial, you can adjust the focus box size, and with the joystick, you can move the focus box around. You can also access the focus area quickly by just pressing the joystick down, and again through the rear control dial, you can adjust the focus box size, and with the joystick, you can move the focus box around.
Number of focus points
You can choose between 117 points and 425 points. The more points you activate on the LiveView, the more challenging it is to navigate through the menus quickly. In this case, you have to trust your eyes to understand if something is in focus or not. In this other article you can find a settings guide for your Fujifilm X100V, where I also explain how to change the size of your focus frame, how to lock it, and other interesting settings for your camera.
MF assist
If you select standard, it will not provide additional guides through the electronic viewfinder or LiveView. However, you can choose the digital split image, and you will have to decide between monochrome or color. This will create a large square box with four horizontal bars in the center of your screen. When the subject is out of focus, there will be a slight offset of the subject in frame while looking at the four bars. Adjusting the focus, the image will become less offset until the lines all match up between all four bars.
Next is digital microprism, which may not be available for older Fujifilm cameras. The digital microprism work the same as the digital split image focusing but instead of the four bars, you have a circle with many small squares. It works essentially the same way as the digital split image.
Lastly, the focus peak highlight is the most effective and popular way of focusing on Fujifilm cameras. With the focus peak highlight you can select the color of choice and intensity. When focusing, your subject in focus will have a colored outline surrounding it.
Focus check
When you turn on the focus check, whenever you turn the focus ring of your camera, the viewfinder or the LiveView will automatically zoom into the focus box. If you half-press the shutter button, you can return to the original frame.
Instant AF setting
Here you have two possible options:
- AF-S, which is single point autofocus
- AF-C, which is continuous autofocus
And this seems weird, as we are talking about autofocus while manually focusing. But sometimes, while focusing manually, it takes a long time to focus from near to far and vice-versa. Thanks to the instant autofocus setting, you can easily access continuous or single-point autofocus in manual mode just by using the back button focusing (it is the button with AEL and AFL written next to it). This button, when pressed, will allow you to use single point or continuous autofocus even if you are manually focusing. And when you release the AEL and EFL button, you will be back to manual focus and can continue fine-tuning the focus.
Depth-of-field scale
If you look into the viewfinder or into the LiveView, there is a distance scale at the bottom of the screen. On the distance scale, you can find a white marker with two blue lines on each side of the marker. The two lines will get longer or shorter depending on the aperture and the focus distance. The white marker is the exact distance of your focus point, and the blue lines mark the effective length in front and behind the focus point that will also be in focus.
When the depth-of-filed scale is on a pixel basis, it calculates the exact distances where things are in focus. Everything out of the blue lines is technically out of focus. On a film format basis, the blue lines become wider than on the pixel basis because the human eye is not perfect at identifying the exact focus. As a result, there is a bit of distance where things may appear in focus on a film format basis. Fujifilm recommends using pixel basis when displaying your photo digitally and film format basis when producing large prints.
As we will see, the film format basis works well if you want to practice zone focusing.
The Single Focus Mode
Some of the settings we have just seen in Manual Focus Mode also apply in this case. In addition, the Single Focus Mode allows you to focus on a subject by pressing down and holding the shutter button halfway down.
The camera will take a photo if you fully press the shutter button. If you release the shutter button when it is pressed halfway will unlock the focus so you can focus on another point.
With the Single Focus Mode, you can select four autofocus modes:
- Single Point
- Zone
- Wide/Tracking
- All
Single Point
Single point will create just one focus box that you can adjust the size of and position in the frame. The camera will focus on whatever is in the focus box. The smaller the focus box and the more focus point you set, the more accurate the focus will be (but with less focusing speed).
Zone
Zone autofocus will create a larger focus box, and the camera will try to focus the best it can to focus on whatever is within that box. Three sizes are possible for the zone focus box; when you press the shutter button halfway, you will notice multiple smaller green boxes within. The smaller green boxes will indicate what point the camera has focused on. The larger your zone autofocus area, the faster the camera will focus, but at the same time, the less predictable it will be what the camera focuses on.
Wide/tracking
With wide/tracking you can’t change the size of the focus area because the focus area is the entire scene. So the camera will choose which is the most exciting subject in the scene, this is the fastest focus mode, but at the same time, it is also the most unreliable.
All
The All option will combine all the autofocus modes between each depending on how small, or large the focus box becomes.
The AF Point Display
The Af point display applies to Zone AF and Wide/tracking mode. It shows you all the selectable focus points within the focus box as greyish squares and points of focus as green.
Face/Eye detection setting
Face/Eye detection will allow the camera to detect the focus on human faces and eyes. In addition, you have the option to select which eye to prioritize the focus on. This setting will override the autofocus modes if a detectable human subject is in the frame. The camera will focus on the face when it can’t detect the eye.
AM+AF
AM+AF, when switched on, will allow you to toggle between using manual focus while in single-point focus mode. In other words, when you half press and hold the shutter button, the camera will first autofocus, then you can rotate the focus ring to make fine adjustments to the focus.
The Continuous Focus Mode
The continuous focus mode allows the camera to adjust the focus as you move the camera around or as the subject moves around in a scene, as long as you half-press the shutter button. As a result, the continuous focus mode looks similar to the single-point focus mode. Still, the difference is that the continuous focus mode will reevaluate and reacquire the focus on whatever subject is within the focus box as long as the shutter button is half-pressed.
AF-C Custom Settings
Next, in settings, you find the AF-C custom settings. You can use the AF-C custom setting to enhance how your Fujifilm camera tracks the subject matter in continuous autofocus.
Other AM/MF settings:
- Store AF mode by orientation: this allows you to have one type of autofocus mode in landscape orientation and single point autofocus in portrait orientation. So you could have Zone or Wide/tracking in landscape orientation and single point in portrait orientation.
- Pre AF: will perpetually engage autofocus even if the shutter button is not half-pressed. It will automatically start focusing as you switch the camera on. The battery with this setting will last less, and the autofocus will constantly work. I recommend not to use this setting too much.
- AF illuminator: this setting will activate the assist light lamp in front of the camera next to the flash to help the camera to acquire the focus faster and more accurately.
- Release focus priority: setting it on Release will allow you to instantly take a photo in Single or Continuous mode without focusing (without doing the half-press on the shutter button). If you set it to Focus, the camera will not take a photo unless you acquire the focus first.
- Corrected AF frame: is used for the optical viewfinder in AF mode, and it tries to resolve parallax issues between the optical viewfinder and the camera lens.
When to use each focus mode and why?
Manual mode is terrific if you want the most control over focus, and with the help of focusing aids, it becomes really intuitive. When paired with the back button focusing, it allows you to acquire precise focus quickly.
For example, it could be beneficial to use the manual mode when capturing images with reflections while shooting through glass panels.
Single shot mode works best when shooting environments where things are not completely static. it is also really helpful for beginners because you simply half-press to autofocus and then full press to take the picture. It also has the option of different AF settings and the ability to turn on the face and eye detection. The single shot mode is a safe option to have your camera set at all times. It can do the work well done and is extremely friendly to beginners.
Continuous mode is the king for fast-paced action photography. In single point Af mode, the continuous mode is suitable for tracking subjects moving towards or away from the camera in a linear path. In zone AF, the continuous mode will maintain in focus whatever is inside the focus box. In wide/tracking AF, the camera will continuously focus on any moving subject in the frame.
If you manage using these three focus modes, you will be more confident making photos in any situation.